Yoga can be a helpful addition to your fitness routine when targeting belly fat. While it’s important to remember that spot reduction is not possible, yoga poses can contribute to overall weight loss and promote a toned abdomen.
Yoga Poses to Target Belly Fat
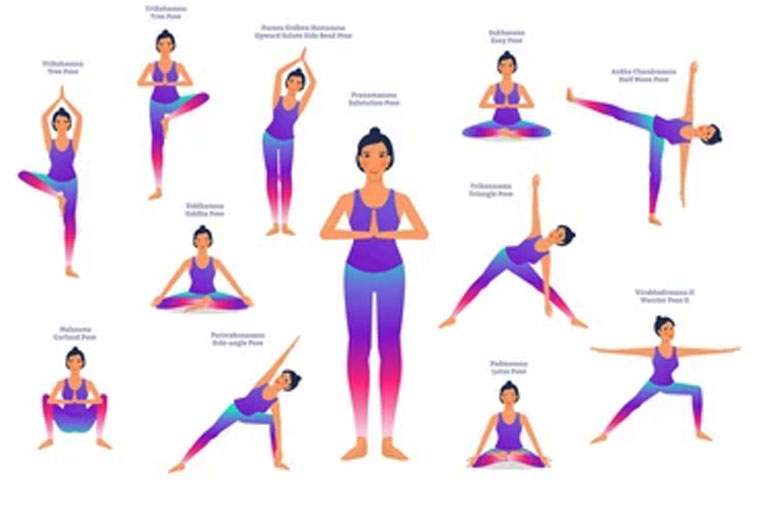
Here are five yoga poses that engage the core and can help strengthen and tone the abdominal muscles:
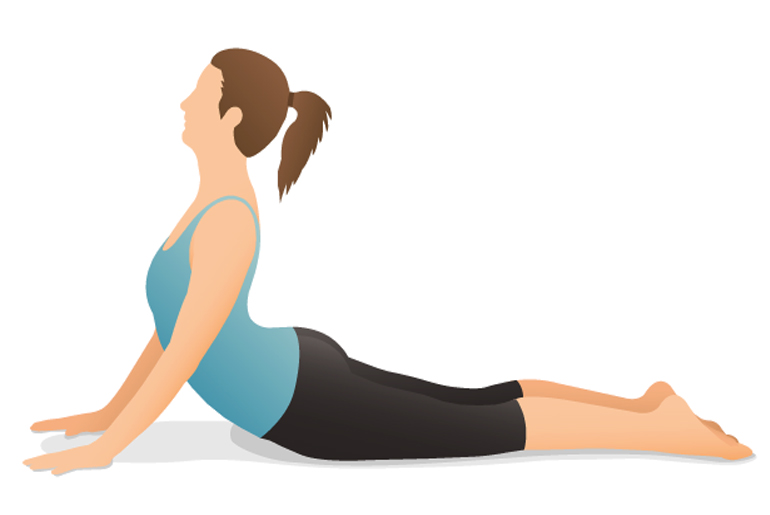
A. Cobra Pose (Bhujangasana):
Cobra Pose, also known as Bhujangasana, is a yoga pose that targets the abdominal muscles while also stretching and strengthening the back. Here’s how to practice Cobra Pose:
- Start by lying flat on your stomach, with your legs extended and the tops of your feet pressing into the mat.
- Place your hands flat on the mat, directly under your shoulders, with your fingers pointing forward.
- Engage your core muscles by drawing your navel towards your spine.
- Inhale deeply and slowly begin to lift your chest off the mat, using the strength of your back muscles. Keep your elbows slightly bent and your shoulders relaxed. Avoid putting excessive pressure on your hands.
- As you lift your chest, maintain a gentle gaze forward or slightly upward, without straining your neck.
- Keep your lower body grounded, pressing your pubic bone and the tops of your feet into the mat.
- Hold the pose for several breaths, focusing on maintaining a lengthened spine and engaging your core.
- To release the pose, exhale as you slowly lower your chest and head back down to the mat.
Cobra Pose provides a gentle stretch to the abdominal muscles while strengthening the back muscles and improving spinal flexibility. It can also help alleviate back pain and improve posture. Remember to practice the pose mindfully, respecting your body’s limits and avoiding any discomfort or strain. As with any yoga pose, it’s essential to listen to your body and make modifications as needed. If you have any pre-existing medical conditions or concerns, it’s advisable to consult a qualified yoga instructor or healthcare professional before attempting Cobra Pose or any other yoga pose.
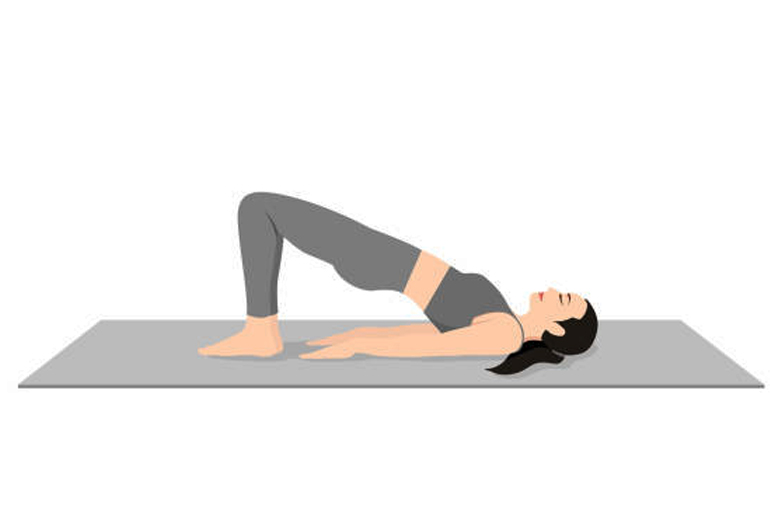
B. Bridge Pose (Setu Bandhasana):
Bridge Pose, also known as Setu Bandhasana, is a yoga pose that targets the core, glutes, and thighs while also stretching the chest and shoulders. Here’s how to practice Bridge Pose:
- Start by lying flat on your back with your knees bent and feet flat on the mat. Keep your feet hip-width apart and parallel to each other.
- Place your arms alongside your body, palms facing down, with your fingertips lightly touching your heels.
- Engage your core by drawing your navel towards your spine.
- Press your feet firmly into the mat as you exhale and slowly lift your hips off the ground. Keep your thighs parallel to each other and engage your glutes and core muscles.
- Roll your shoulders back and down, allowing your chest to expand and open. Avoid scrunching your shoulders up towards your ears.
- If it feels comfortable, you can clasp your hands together beneath your pelvis and extend through your arms, lifting your chest even higher.
- Keep breathing deeply and evenly as you hold the pose for several breaths. You can also explore gently rocking your hips from side to side to release tension in the lower back.
- To release the pose, exhale and slowly lower your spine back down to the mat, one vertebra at a time.
Bridge Pose helps strengthen the core, glutes, and thighs, while also improving spinal flexibility and opening the chest. It can be a great pose for energizing the body and relieving stress. As with any yoga pose, it’s important to listen to your body, modify the pose as needed, and avoid any discomfort or strain. If you have any pre-existing medical conditions or concerns, it’s advisable to consult a qualified yoga instructor or healthcare professional before attempting Bridge Pose or any other yoga pose.
C. Side Plank (Vasisthasana):
Side Plank, also known as Vasisthasana, is a yoga pose that primarily targets the core muscles, including the obliques, while also engaging the arms, shoulders, and legs. Here’s how to practice Side Plank:
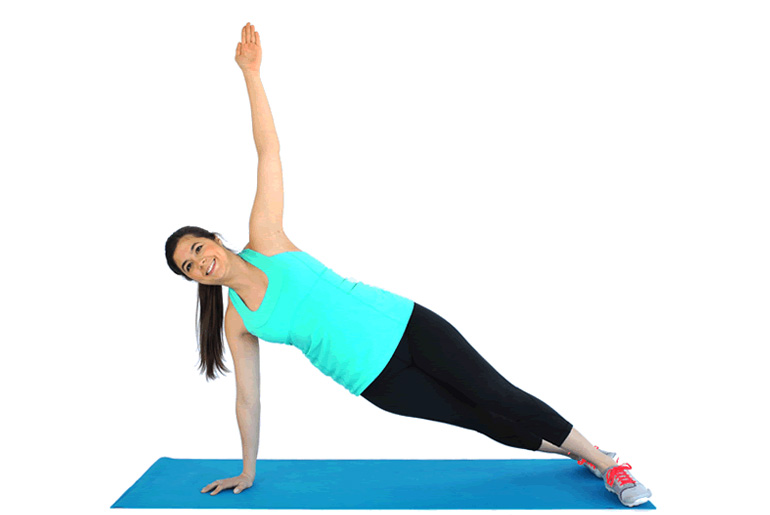
- Start by coming into a plank position, with your palms flat on the mat and your shoulders directly above your wrists. Your body should form a straight line from head to heels.
- Shift your weight onto your right hand and the outer edge of your right foot. Stack your left foot on top of the right foot. Alternatively, you can modify by bending your bottom knee and placing it on the mat for added stability.
- Engage your core muscles by drawing your navel towards your spine, and lengthen through your spine.
- On an inhalation, lift your left arm toward the ceiling, extending it directly over your shoulder. Keep your gaze focused on your top hand or slightly forward to maintain balance.
- Keep your body in a straight line, avoiding any sagging or arching in the hips.
- Hold the pose for several breaths, aiming to maintain stability and engage the core muscles. Start with a few breaths and gradually work your way up to holding the pose for longer durations.
- To release the pose, exhale as you lower your left hand back to the mat and return to a plank position. Take a moment to rest, then switch to the other side and repeat the steps.
Side Plank is a challenging pose that strengthens the core, improves balance, and builds stability. It also helps tone the oblique muscles and improves overall body awareness. As with any yoga pose, it’s important to listen to your body, make modifications as needed, and avoid overstraining or discomfort. If you have any pre-existing medical conditions or concerns, it’s advisable to consult a qualified yoga instructor or healthcare professional before attempting Side Plank or any other yoga pose.
D. Plank Pose (Phalakasana):
Plank Pose, also known as Phalakasana, is a foundational yoga pose that primarily targets the core muscles while also engaging the arms, shoulders, and legs. Here’s how to practice Plank Pose:

- Start by coming onto your hands and knees on a yoga mat. Align your wrists directly under your shoulders, and spread your fingers wide for stability. Your knees should be directly under your hips.
- Step one leg back at a time, extending your legs fully and pressing the tops of your feet into the mat. Engage your core by drawing your navel toward your spine.
- Your body should form a straight line from your head to your heels. Avoid letting your hips sag or lifting them too high.
- Press firmly through your palms, distributing the weight evenly between your hands and fingers. Keep your gaze slightly forward, with your neck in line with your spine.
- Engage your leg muscles, squeeze your glutes, and draw your shoulder blades down and back to create stability in the pose.
- Breathe deeply and hold the pose for 30 seconds to 1 minute, or as long as you can maintain proper form and engage your core.
- To release the pose, gently lower your knees to the mat and come back to a kneeling position.
Plank Pose is an excellent exercise for building core strength, stability, and endurance. It also engages the muscles of the arms, shoulders, and legs, making it a full-body strengthening pose. As with any yoga pose, listen to your body, make adjustments as needed, and avoid straining or discomfort. If you have any pre-existing medical conditions or concerns, it’s advisable to consult a qualified yoga instructor or healthcare professional before attempting Plank Pose or any other yoga pose.
E. Boat Pose (Navasana):
Boat Pose, also known as Navasana, is a yoga pose that targets the abdominal muscles, strengthens the core, and engages the hip flexors and lower back. Here’s how to practice Boat Pose:
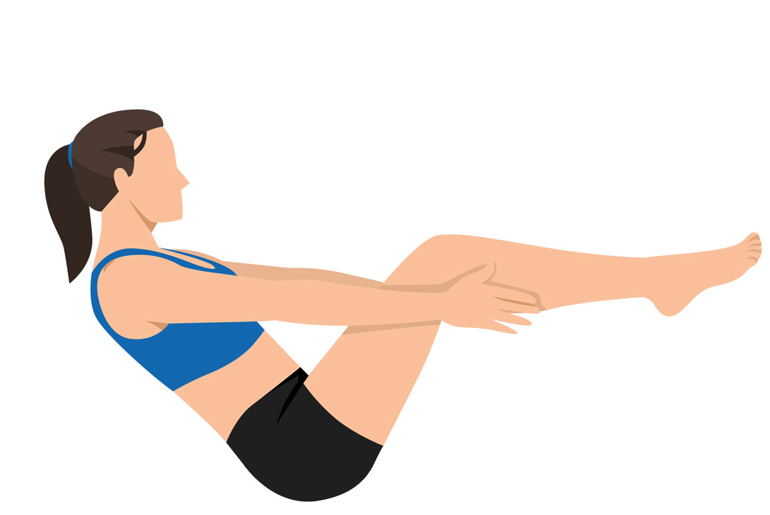
- Begin by sitting on the mat with your legs extended in front of you.
- Place your hands on the mat slightly behind your hips, fingers pointing towards your feet. Lean back slightly while keeping your spine straight.
- Take a deep breath in, engage your core, and lift your feet off the ground. Simultaneously, start to straighten your legs, aiming to bring them to a 45-degree angle with the floor. Keep your toes pointing toward the ceiling.
- At the same time, extend your arms forward, parallel to the floor, with your palms facing each other. Your shoulders should be relaxed and away from your ears.
- Maintain a lengthened spine, avoiding rounding or collapsing in the chest. Keep your abdominal muscles engaged to support your balance.
- If you’re comfortable, you can work towards straightening your legs fully, forming a V shape with your body. However, it’s essential to listen to your body and work within your current flexibility and strength.
- Hold the pose for several breaths, aiming to gradually increase your hold time. Begin with 10-15 seconds and gradually work your way up to 30 seconds or longer.
- To release the pose, exhale as you gently lower your feet and back to the mat. Take a moment to rest and observe any sensations in your body.
Boat Pose strengthens the core muscles, improves balance, and promotes stability. It also engages the hip flexors and muscles in the lower back. As with any yoga pose, remember to listen to your body, modify as needed, and avoid straining or discomfort. If you have any pre-existing medical conditions or concerns, it’s advisable to consult a qualified yoga instructor or healthcare professional before attempting Boat Pose or any other yoga pose.